How to organize a nursery closet: a simple system that keeps up as they grow
This post contains affiliate links. If you buy through them, we may earn a small commission at no extra cost to you.Learn more.
To organize a nursery closet, give every part of it one job and sort the clothes by age. The rod holds what your baby wears now, divided by age range. The top shelf holds what you need least. The back of the door holds what you grab in a hurry, and a drawer holds the small things that otherwise disappear. That’s the whole system, and it’s the one we use in our own small-ish nursery. Below is how to set it up, step by step, and how to keep it working as your baby moves through the sizes.
If you’d rather go straight to the products, the four organizers we use are rated and compared in the best baby closet organizers. This page is the method.
The system at a glance
| Part of the closet | What goes there | What we use |
|---|---|---|
| The rod | The clothes your baby wears now, divided by age | Wooden size dividers |
| Top shelf | Out-of-season clothes, the next size up, towels, toy overflow | Framed storage baskets |
| Back of the door | Grab-and-go items: diaper packs, wipes, the thermometer, nail clippers | Over-the-door organizer |
| A dresser drawer | Socks, mittens, hair bows and folded onesies | Drawer organizer with cells |
Step 1: Empty it and sort what you actually have
Start with everything out. Make three piles: clothes that fit now, clothes for the next size or two, and clothes your baby has outgrown. Anything outgrown doesn’t go back in the closet at all. It goes to storage, to a friend or out of the house.
This step matters more than any product. A closet organized around clothes that don’t fit is still full of clothes that don’t fit, and the right size ends up buried under the wrong ones.
Step 2: Give each part of the closet one job
Before you put anything back, decide what each part of the closet is for. The rule is simple: the things you reach for most go where your hands already are, and the things you reach for least go highest or furthest away.
That gives you four zones. The rod is for what your baby wears now. The top shelf is for what you need least. The back of the door is for grab-and-go things. And the small stuff goes in a drawer rather than the closet itself. The table above shows what goes where in ours.
Step 3: Divide the rod by age
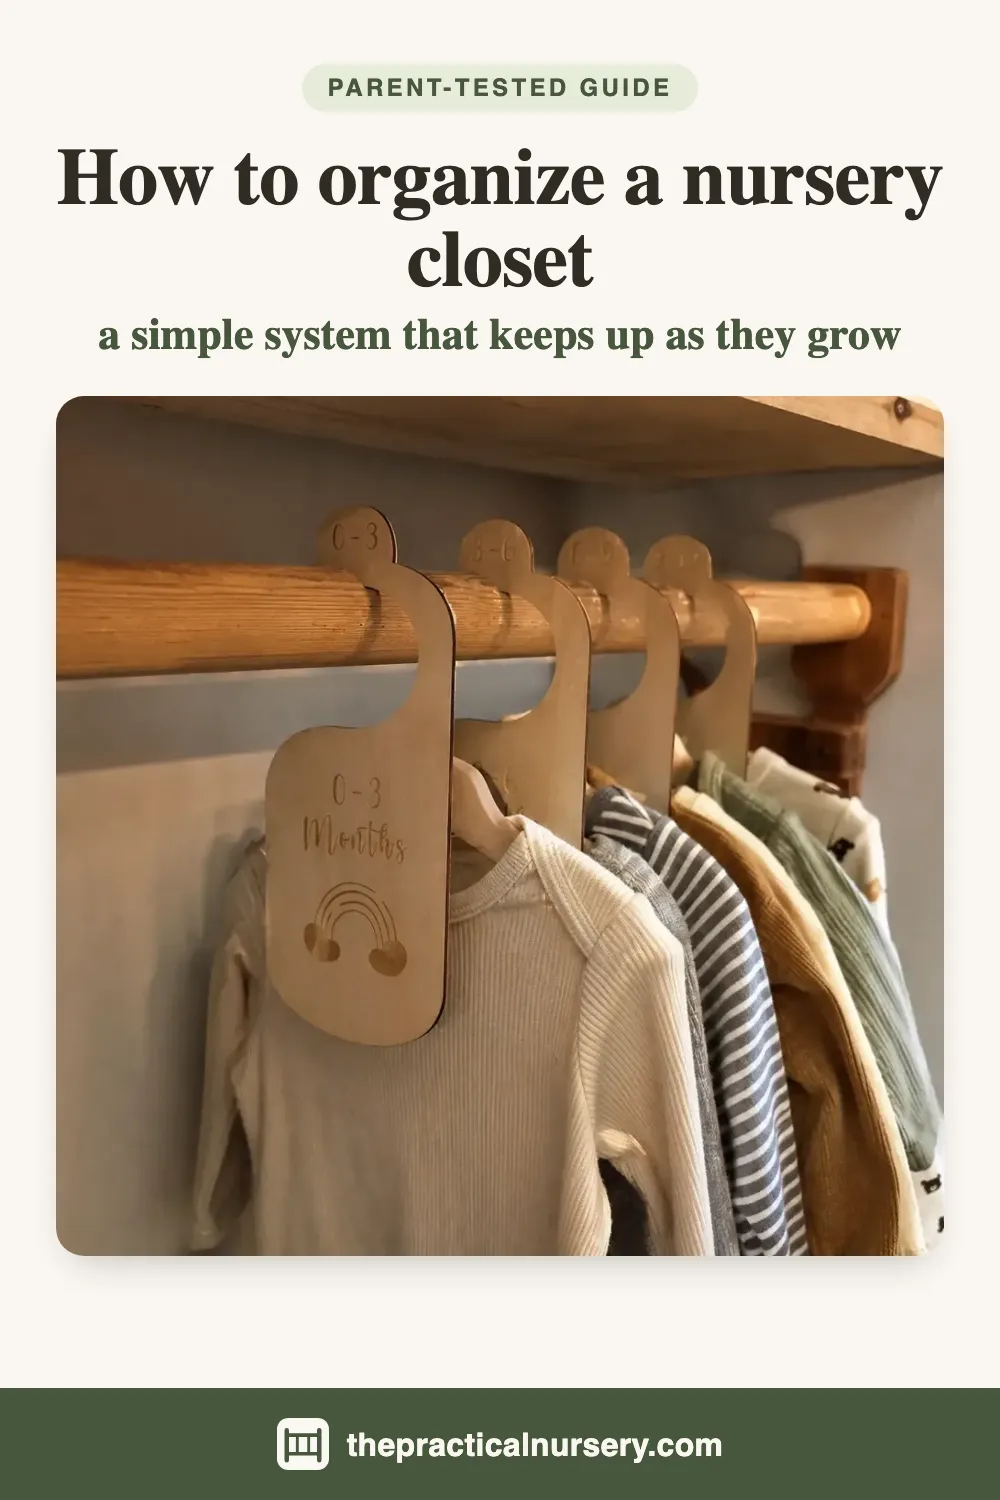
This is the step that fixes the most common closet complaint, which is not finding the right size fast. Put a divider on the rod for each age range: newborn, 0-3 months, 3-6, 6-9, 9-12, 12-18 and 18-24 months. Then hang each size in its own section.
Sort by age range rather than by the exact size on every tag. For the first two years, size roughly tracks age, so age ranges are much easier to keep up with when you’re tired. The more precise tag sizes matter more later on.
Choose dividers you can read in the dark. Tiny decorative labels look good and are useless at 2 a.m. Ours are a wooden set with a carved icon on each tab, a sun, mountains, stars or a moon, instead of printed text, so you can find the right section with a glance.

Hang the current size at a height you can reach without looking. That one section is the one you’ll use dozens of times a week, so it should be the first thing your hand lands on.
Step 4: Use the top shelf for what you need least
The top shelf is the hardest to reach, so it’s for the things you use least: out-of-season clothes, the next size up, spare towels and toy overflow. Ours has four baskets up there, one for out-of-season clothes, one for towels and two for toys and overflow.
Use baskets that stay upright. Ours have a steel frame and a solid base, so they don’t slump when they’re full the way the plain fabric bins we used before did, and they have handles, so you can pull a full basket down instead of digging around above your head. Measure the shelf before you buy, because a set of large baskets takes more room than you’d expect.
Step 5: Use the back of the door
The back of the closet door is storage most nurseries don’t use. An over-the-door organizer turns it into a grab-and-go station. Ours hooks over the top of the door with no tools or drilling. Diaper packs and wipes go in the deep front pockets, and the small mesh side pockets hold the things that always go missing: the thermometer, the nail clippers, the hand sanitizer.
It needs a standard hinged door, so it won’t work on sliding or bifold closet doors. If your door is the right kind, it adds a lot of storage without taking any floor or shelf space. The changing supplies themselves are better kept together in a caddy that moves with you, and we cover what to put in a diaper caddy.
Step 6: Move the small things to a drawer
Socks, mittens and hair bows have no business on a rod or a shelf, and in a plain drawer they sink to the bottom and vanish. A drawer organizer with separate cells fixes that. Ours lives in the top dresser drawer, and we took out a couple of its adjustable dividers to make room for folded onesies.
This keeps the closet itself for hanging clothes and bigger storage, and it means the small things have a fixed home you can find without emptying the drawer.
Step 7: Decide how much of each size you keep
A closet stays organized more easily when each section of the rod holds roughly the same amount. Our realistic registry checklist suggests 8 to 10 onesies and 6 to 8 sleepers per size, which is a useful ceiling. If a size section is overflowing, it’s usually a sign there’s more in it than you’ll get through before your baby outgrows it.
Step 8: Rotate when your baby sizes up
Babies move through sizes quickly in the first year, so the closet has to change with them. When your baby moves up a size, do three small things. Bring the next size down from the top shelf and hang it in its section on the rod. Take the outgrown size off the rod and move it up to a basket or out of the house. And check the shelf for anything that’s now two sizes behind.
Doing this at each size change keeps the rod holding only what fits now and what’s next, which is what makes the dividers work. Leave it too long and the outgrown clothes creep back onto the rod.
If your closet is small
Most nursery closets are small, so don’t try to do everything at once. Start with whichever zone is the worst mess today. If the rod is one undivided wall of clothes, start with dividers. If there’s no shelf or closet space left, start with the back of the door. If the shelf is a heap, start with baskets. If the drawer swallows socks, start with a drawer organizer.
Most small nursery closets end up needing two of these, not all four. And skip the complete closet systems that come as a dozen matching pieces. You don’t need six kinds of storage before you know which one you’ll use every day. Start with one, then add only what you run out of space for. It’s the same thinking behind our list of baby items you don’t need.
Keeping it organized
A closet stays organized when putting things away is as easy as getting them out. Keep the current size at reach height, keep the next size one step away on the shelf, and rotate at every size change. Once a week, put back anything that has drifted into the wrong section, which is what stops the closet sliding back into one big pile.
The rest of the room
The same idea, one home for each kind of thing, works for the whole nursery. The changing station, the diaper pail and the small things that go missing all get the same treatment in our nursery organization ideas, and the changing supplies themselves live in a caddy we cover in the best diaper caddy, with the pail that sits alongside it in the best diaper pail.
The bottom line
To organize a nursery closet, empty it, keep only what fits now and what’s next, and give every part of the closet one job: the rod for the current clothes divided by age, the top shelf for what you need least, the back of the door for grab-and-go things, and a drawer for the small stuff. Then rotate at every size change. The four organizers that make it work for us are compared in the best baby closet organizers.
Frequently asked questions
How do you organize a nursery closet?
Empty it, keep only what fits now and the next size up within reach, divide the hanging rod by age, put what you rarely need on the top shelf, use the back of the door for grab-and-go items, and move small things like socks into a drawer organizer. Then rotate: when your baby sizes up, the next size comes down from the shelf and the outgrown size goes up or out.
How do you separate baby clothes by size in a closet?
With closet dividers on the hanging rod, one per age range: newborn, 0-3, 3-6, 6-9, 9-12, 12-18 and 18-24 months. Sorting by age range is easier to keep up than sorting by the exact size on each tag, because for the first two years size roughly tracks age. Dividers with icons or large labels are easier to read in low light than small printed ones.
What goes on the top shelf of a nursery closet?
What you reach for least: out-of-season clothes, the next size up, spare towels and toy overflow. Baskets with a frame stay upright when they are full, where plain fabric bins tend to slump. Keep the clothes your baby wears now on the rod, at a height you can reach without looking.
How many clothes do you need in each size?
Our registry checklist suggests 8 to 10 onesies and 6 to 8 sleepers per size. Having a set number per size also makes the closet easier to keep organized, because each section of the rod holds about the same amount.
How do you organize a small nursery closet?
Give every part of it one job and use the space you are not using yet, especially the back of the door. Start with whichever zone is the worst mess rather than buying a full storage system. Most small nursery closets end up needing two organizers, usually rod dividers and one kind of bin or door organizer, not a whole set.